Krystal Staff Project Part 4 – Shaft Embossing Structures Modeled and Printed

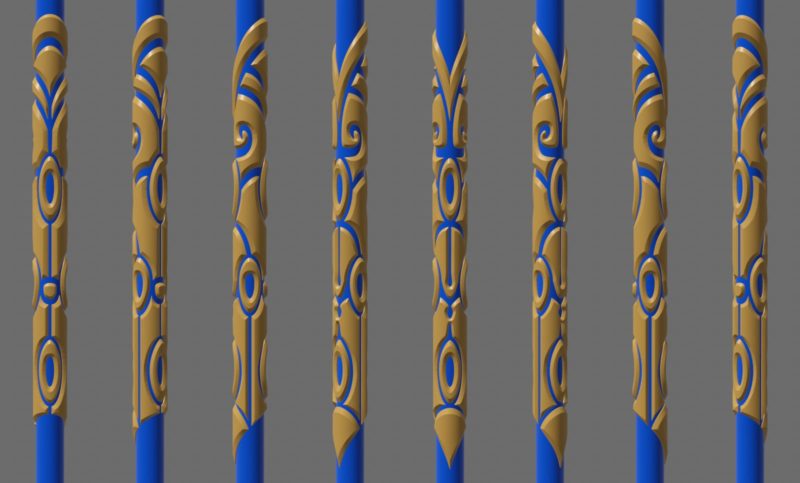
If you've been wondering where I've been or what I've been doing for the last two weeks, here's your answer! I've been spending all my spare time (and some of my sleep schedule) working on the extremely complex embossing pattern for the staff. Just to give you a taste of it, here's what I had to do to generate the image above:
- Take my existing staff texture SVG and remake it with single curves.
- Import the SVG into Blender.
- Manually create geometry for the surface of the curve (which involved several false starts and issues). This manual process was done using the very complex and detail-focused vertical-only polygon method, since the structure would need to be wrapped around a tube.
- Manually extrude the geometry and bevel it by hand (because the built-in tools couldn't handle it for some reason).
- Made sure dimensions were correct.
- Added subdivision detail.
- Wrapped the model around a tube.
- And finally scaled it appropriately to the real size of the tube.
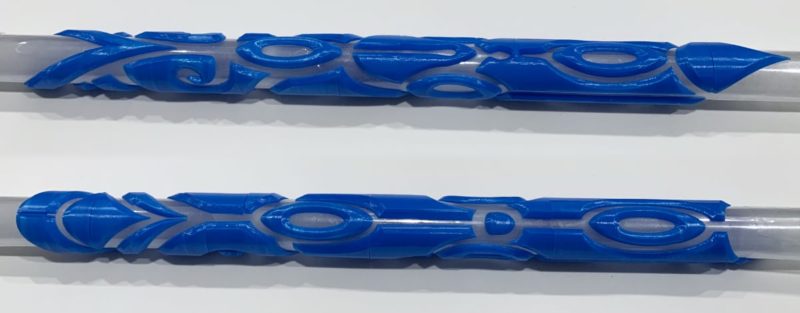
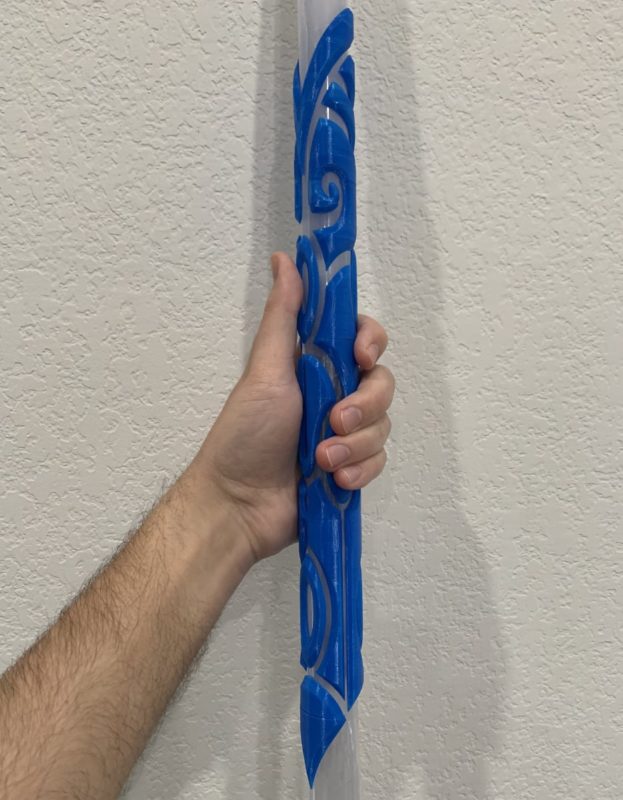
All this had to be done before I could begin chopping the pieces up for 3D printing. Fortunately, that process was much faster. Over the last three days or so, I've been able to print one copy of ALL the parts. I wrapped some tape around a tube, sticky side out, to allow me to position the 3D prints where they would normally be glued on. As you can see below, it worked beautifully.
The inclusion of these embossed parts makes the prop feel quite special in the hand. It's very "alien", if you will, and very exciting to have something so intricate to show off.
The next steps will involve gluing these pieces together, followed by smoothing and prepping their surfaces. Once I have one good copy of all the pieces, I will make a silicon mold of them (something I've never done before), so that I can make colored resin copies, perfectly duplicating them. Each shaft will take about 3 sets of these pieces in a repeating pattern. With the three copies, I will be able to start gluing them to the shaft (covered in blue window tint). When everything is attached, I will probably apply some kind of clear lacquer to the outer surface to ensure that the glued pieces stay in place by basically covering the entire surface with a thin layer of plastic. This will also protect the coloring of the embossed parts.
Here's what the SVG pattern ended up looking like:
So still a lot of work to do, but it's now really starting to look like Krystal's Staff!
PS - Is anyone interested in the 3D files I made? I can make the SVG pattern, the 3D embossed files, and the 3D printable embossed parts available if anyone is interested. Perhaps to make your own highly accurate in-game model.


Comments
looks cool, a in-game version would look cool too, in .obj file format.
I’d love to get one of these! Krystal’s Staff is my favorite weapon