Krystal Staff Project Part 2 – Shaft Lighting and Mockup Tips

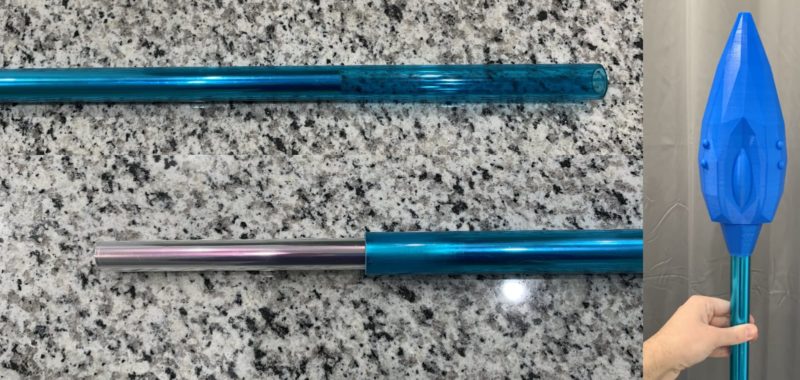
I spent a lot of time over the weekend working on the staff project. I managed to get the staff's shaft cut to the right length, smoothed the ends, applied to blue window tint, and prepared the internal reflective and refractive films. With great pleasure, I can say that the blue window tint worked amazingly well on the shaft. Unless you look very closely, it really does look like the shaft was made of blue polycarbonate. Putting the tint on was pretty time-consuming though. It requires you to cover the whole thing in soap and then wrap it and slowly push it down over and over as the soapy water evaporates and the sticky part of the film returns to stickiness. Rolling up and inserting the diffusion and reflection film was straightforward. You can see what the tube looks like with no film inside and what the film looks like outside the tube in the photo above.
Unfortunately, the theory that the light could be transmitted down the surface of the tube and reflected using the internal films was a COMPLETE FAILURE. Light just doesn't want to travel down the tube that way, or if it does, the effect is so small as to be invisible. It's back to the drawing board on how to obtain light down the shaft in a space-efficient way. I tried a couple different methods of trying to light the shaft using a slightly different method, but it failed as well. So it's back to the drawing board. I did find another potential technology, though: Lightpaper. I contacted the manufacturer to see if they plan to make it available in the near future. After that, EL tape and EL wire may be my best bet for now.
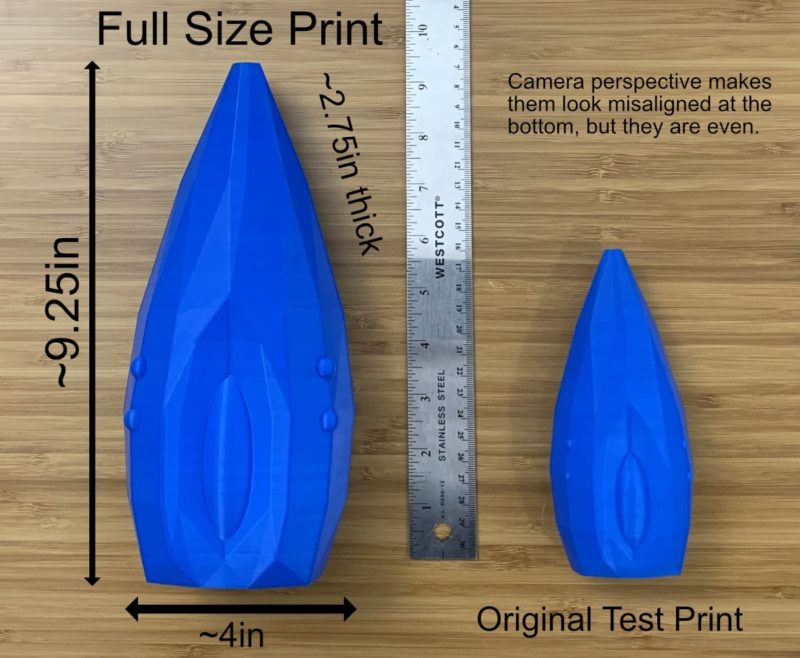
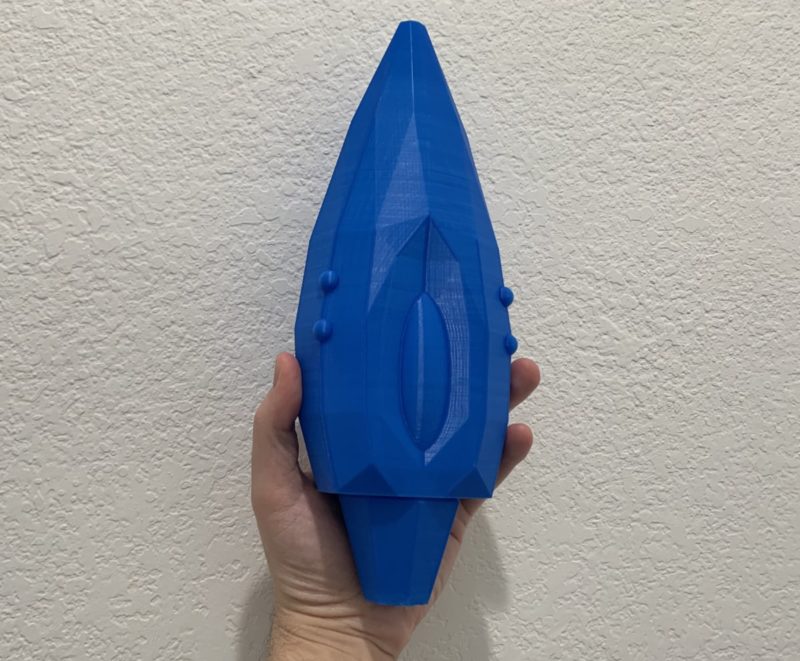
In light of the lighting situation, I elected to shift focus slightly. Now that the shaft is the right length, I thought I would print out the tips to get a good idea of the scales involved. That way, I'll have something tangible to think about when designing the internal mechanisms and lighting layouts. It took about 13 hours, but I printed the Super Smash Bros Ultimate version of top tip at actual size with a hole just big enough to slide the shaft onto it. Literally all I did was scale it up and prepare it for printing, but it's otherwise exactly the same 3D structure, polygons and all, as the in-game model. The print came out amazingly well for its size. It's really one of the easier things to print. Here it is compared to a previous proof-of-concept print.
When I showed this off yesterday on Discord, a couple people seemed interested in getting a copy of the mockup 3D print for their own. If you're interested in one, I can print you the top tip like this one for $20 plus shipping. Send me an email if you're interested. In the meantime, the next thing I'm going to do is prepare a mockup for the lower tip that will fit onto the shaft. That way, we'll be able to see a mockup for the whole staff at once.


Comments
I hope Ayano shows up again, as long as she doesn’t have the coronavirus.